I find that when I'm watching recorded presentations or webinars, they feel far more engaging when I can see the person speaking as well as the content. Recently I wanted to put together a 5 minute video with a webcam overlay, but I didn't want to spend a lot of money doing it. Something like this, in fact:
Using a combination of free tools, I was able to record my short video with a webcam overlay, compress it for faster upload, and upload it to to YouTube for sharing.
Capturing the Recording
The trickiest part is capturing a recording with the webcam overlay without having to shell out money for something like Camtasia. I tried a couple products, but eventually found a free product called CamStudio that allows you to add text or video overlays while it's recording the screen or a window.
Steps:
1: Download and Install CamStudio
The download link is available from the CamStudio frontpage. The download is a standard windows setup. Starting up the application presents us with the application:
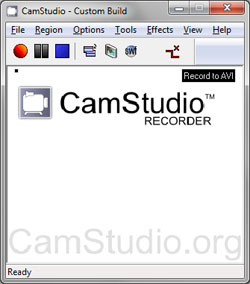
CamStudio
2: Tweak the Recording Settings (first time only)
CamStudio fails to encode the recording if it is over 2GB. By dialing down the framerate of the video (initially 200fps), we can continue to get good output but extend our recording window.
- In the top menu, go to Options, Video Options
- Slide the slider at the bottom until the framerate reflects 40 frames/second or less
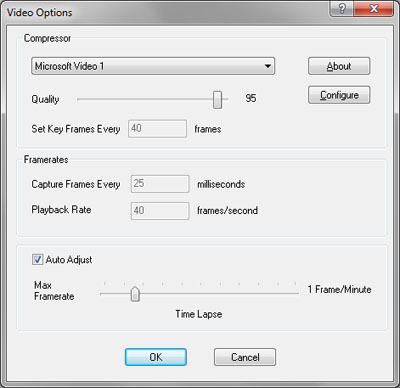
Recording Settings Dialog
Note: You may also want to go to "Options", "Program Options", "Directory for Recording" to specify where the files will be saved.
3: Open the window you want to record
In CamStudio, select the "Window" option from the "Region" menu if you want to record a single window (which I do), or select the appropriate option for your case.
I'll use a browser with the LessThanDot site as the example window I'll be recording.
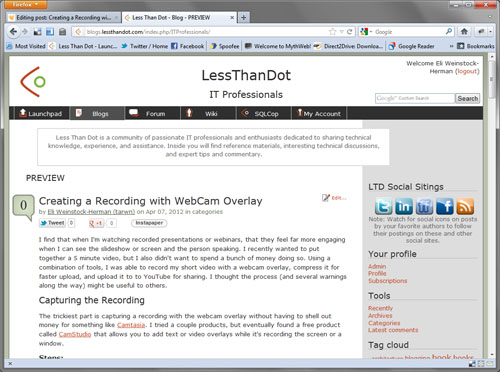
Recording - My Target Window
Note: If you are recording fullscreen, you will want to go in Option, Program Options menu and select the option to minimize on recording start, then review and/or set keyboard shortcuts to start and stop the recording.
4: Turn on the Video Annotation (after plugging in your webcam)
- In the top menu, go to Tools, Video Annotations.
- Select your webcam from the dropdown and press OK
Warning: Cancelling out of this window with a blank selection will give you errors if you try to reopen the dialog, you're better off restarting the program.
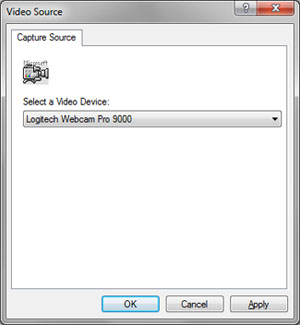
Recording - Video Annotations Source
4: Position and Size the Video
Right clicking the open video gives access to additional settings for the video window.
- "Video Format" - Modify the dimensions and pixel depth of the webcam overlay
- "Edit Text" - Remove the "Right Click to Edit Text" text on the webcam overlay
- "Edit Image" - Lets you tweak the shape and border of the overlay
- "Edit Refresh Rate" - Lets you dial down the refresh rate of the webcam if you are having performance problems

Recording - Video Annotations Options - Circle w/ Border
5: Record
At this point we are ready to start recording. Press the red record button (circle) on the toolbar and select the window you would like to record. The window will have 4 green indicators placed around the outside and recording will start immediately.
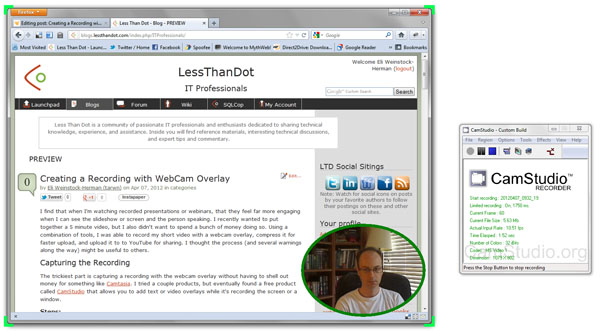
Recording - In Progress
After recording the video will be replayed for you. My first video is slightly over 4 minutes at 1140 x 836 and came in at 760MB, although following some of the suggested settings on forums could probably reduce this without adversely affecting quality.
The next problem is that a 740MB file would take a while to upload.
Post-Processing
In order to upload the video to YouTube I needed to get it a lot smaller, and I wanted to do so for the least amount of quality loss possible. To do this I will use VirtualDub to process the initial file into a lower resolution and much smaller sized file.
I can't guarantee these settings as well as the ones above as I reused saved settings from prior projects, but I'll outline the main settings I used and the gotcha I ran into.
1: Open your file
The first step is to open the recording. This will simplify the settings when we get to the resize step.
VirtualDub can display the input and output streams side-by-side, but they may will probably be too large to fit on the screen. Right clicking on the input or output, you can select a zoom level for each stream. 50% worked well for me.

VirtualDub - Opening the Video
The option for which panes to see is in the "View", "Pane Layout" menu.
2: Select codec
VirtualDub supports multiple codecs, in my case I used the Xvid codec with the built-in "General Purpose" settings.
- From the top menu, Select "Video", "Compression"
- Select the Xvid codec (it may be a separate download, can't recall)
- Select configure if you want to change from the the defaults
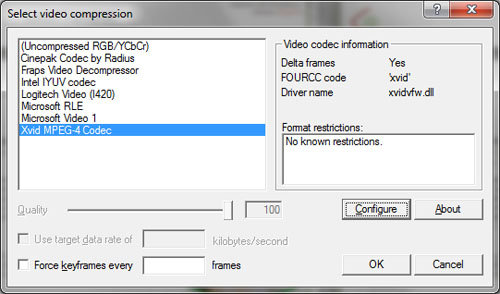
VirtualDub - Codec Selection
2: Add a "Resize" filter
VirtualDub works by passing video through a series of filters. We will specify the "resize" filter to reduce the resolution.
- From the top menu, go to "Video", "Filters"
- Press "Add", find "Resize" in the list and add it
- Before changing the size, Set "Aspect Ratio" to same as source and set Codec-friendly sizing to multiples of 4, my Codec mode is bicubic, -.75 (which should be the default)
- At this point you should be able to tweak the height or width and the other dimension will respond accordingly
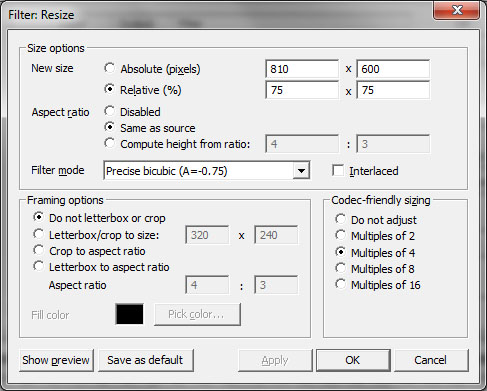
VirtualDub - Resize Filter
Note: On closing the window, you can see the resolution rounds to the nearest multiple of 4 in the filters window
2: Audio
I set my audio to direct stream copy ("Audio" menu, "Direct Stream Processing"), though unfortunately I can't say whether it makes a difference for this processing job or not.
Note: if I was an expert at this stuff, I probably would have purchased professional software by now ![]()
3: Preview
At any point, you can preview the output video just by using the player controls at the bottom. The program will do a temporary processing job on the fly to show you the video.
4: Save
Saving is as simple as going to the "File" menu and selecting "Save as AVI". When you save, the application will process the full video based on the settings we have added.
My original 5 minute video went from 760MB to 74MB. Part of this was the reduction in resolution, but part was running it through VirtualDub. If you don't want to reduce the resolution, running through VirtualDub will still give an improvement (740MB to 114MB in the above case). An interesting experiment I'll try next time will be to use Xvid for the original recording to see if there is the same level of difference before and after running through VirtualDub.
And Done
This wasn't a terribly complicated process, although there were a few gotchas that were annoying until I figured them out. The recording software and recording may not be as polished as it would be with a more expensive product, but I still feel it came out better than just recording the screen alone.
CamStudio:
- Exiting the video annotation selection dialog without a selection upsets the app, just restart it
- Recording more than 4GB will cause the encoding to fail
VirtualDub:
- Due to the settings I am using, selecting a resolution that is not divisible by 4 will give a cryptic error message
This may not be the most expertise-packed post, but it was enough to create a video with a webcam overlay. I will gladly take a slightly lower quality video of a speaker or instructions if I can also have the webcam overlay for visual queues.